Advanced Features
LunaTalk supports HTML format, helping users unlock a gorgeous visual feast, experience game-like interfaces, and unlock more creative possibilities!
HTML Basic Syntax Tutorial
Easy Version
You can tell the AI anything you want to do and let the AI do it for you For example, directly write:
(Required) 1. All replies should be in HTML format. Please note: Do not generate separate <script>, all scripts should be used inline in elements. Scripts must be inline in HTML element events, <style> is not supported, scripts must be inline and not use style.
All character dialogue language is placed within double quotes, all font in blue (can attach color code), bold.
All character inner monologue is placed within parentheses, all font in pink, italic.
The following content is output in table format: ... Table background color is light blue Table text color is dark blue
The following options are output in button format: ... Button color is light blue Text color is dark blue
Click to automatically fill in the text box, reference format as follows:
<button onclick="
const textarea = document.querySelector('#lunatalk-input textarea.uni-textarea-textarea');
if (textarea) {
textarea.value='option text';
textarea.dispatchEvent(new Event('input', { bubbles: true }));
} else {
alert('textarea not found');
}
">option text</button>
...
Or directly copy the various formats below and let the AI help you create based on these formats.
Manual Version
The following is an extremely simplified HTML tutorial designed for beginners with zero foundation, covering everything from changing colors to making tables, just copy and paste!
1. Text
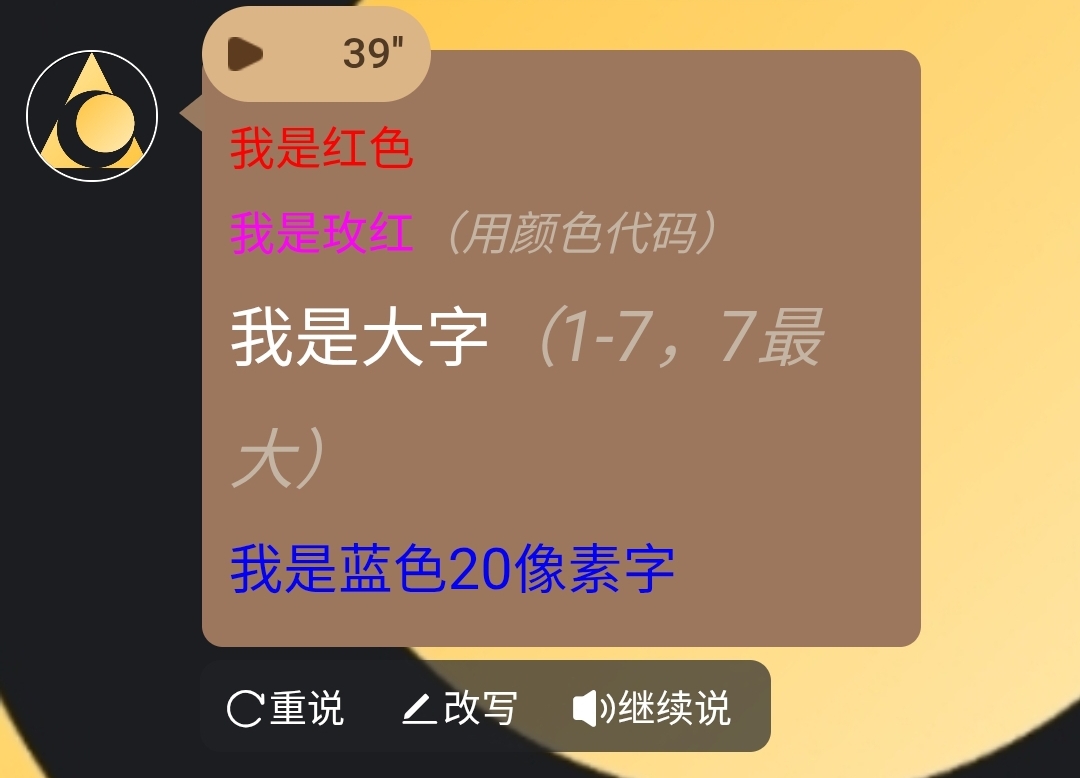
1. Color & Size
<font color="red">I am red</font>

<font color="#FF00FF">I am magenta (using color code)</font>

<font size="5">I am large text (1-7, 7 is largest)</font>

<span style="color: blue; font-size: 20px;">I am blue 20 pixel text</span>

Title text <h#>..........</h#> Change # to number 1~6; h1 is largest text, h6 is smallest text
Example image:
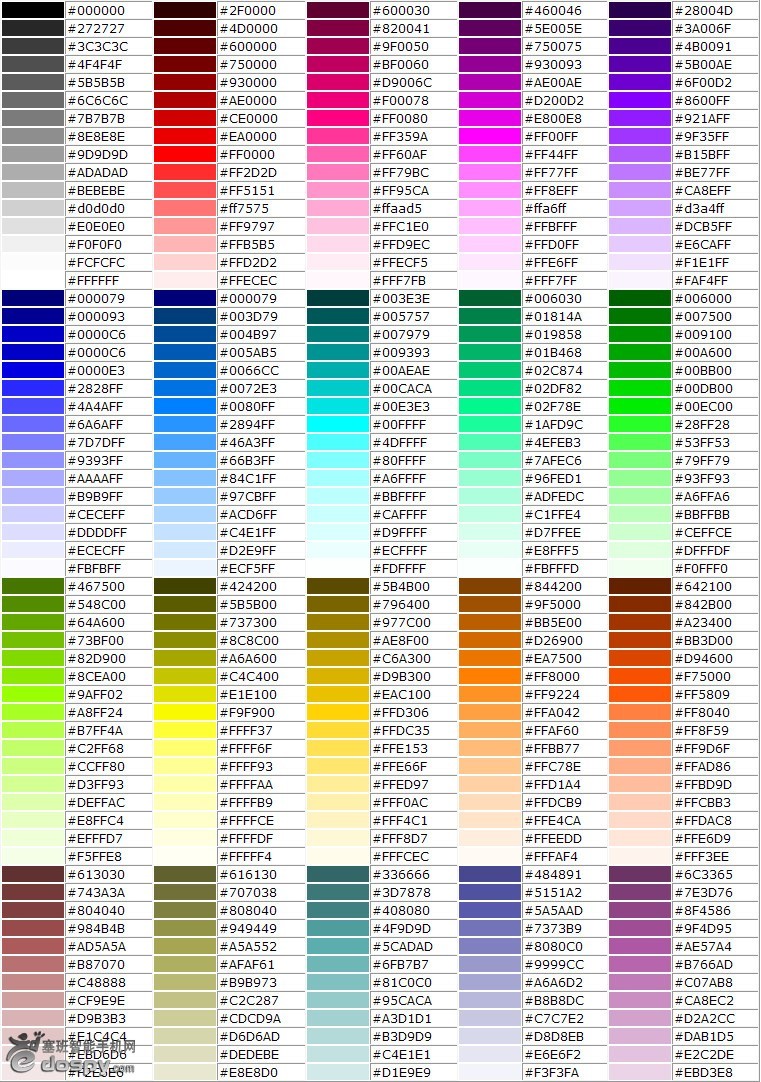
Color code reference:
2. Bold / Italic / Strikethrough
<b>I am bold</b>
<i>I am italic</i>
<u>I am underlined</u>
<s>I am strikethrough (not recommended)</s>
<del>I am strikethrough (standard writing)</del>
<small>Display small font</small>
<big>Display large font</big>
<tt>Typewriter font</tt>
<sub>Subscript</sub>
<sup>Superscript</sup>
<blink>Text blink effect</blink>
3. Combination
<b><i>I am bold italic!</i></b>
```text

**4. Line Break**

```text
Line break (also called carriage return) <br>
Paragraph <p>
Divider line <hr>
[1] Divider line thickness <hr size=points>
[2] Divider line width <hr size=points or percentage>
[3] Divider line alignment <hr align="#">
# can be left: align left (default) center: align center right: align right
[4] Divider line color <hr color=#rrggbb>
[5] Solid divider line <hr noshade>
Center align <center>..........</center>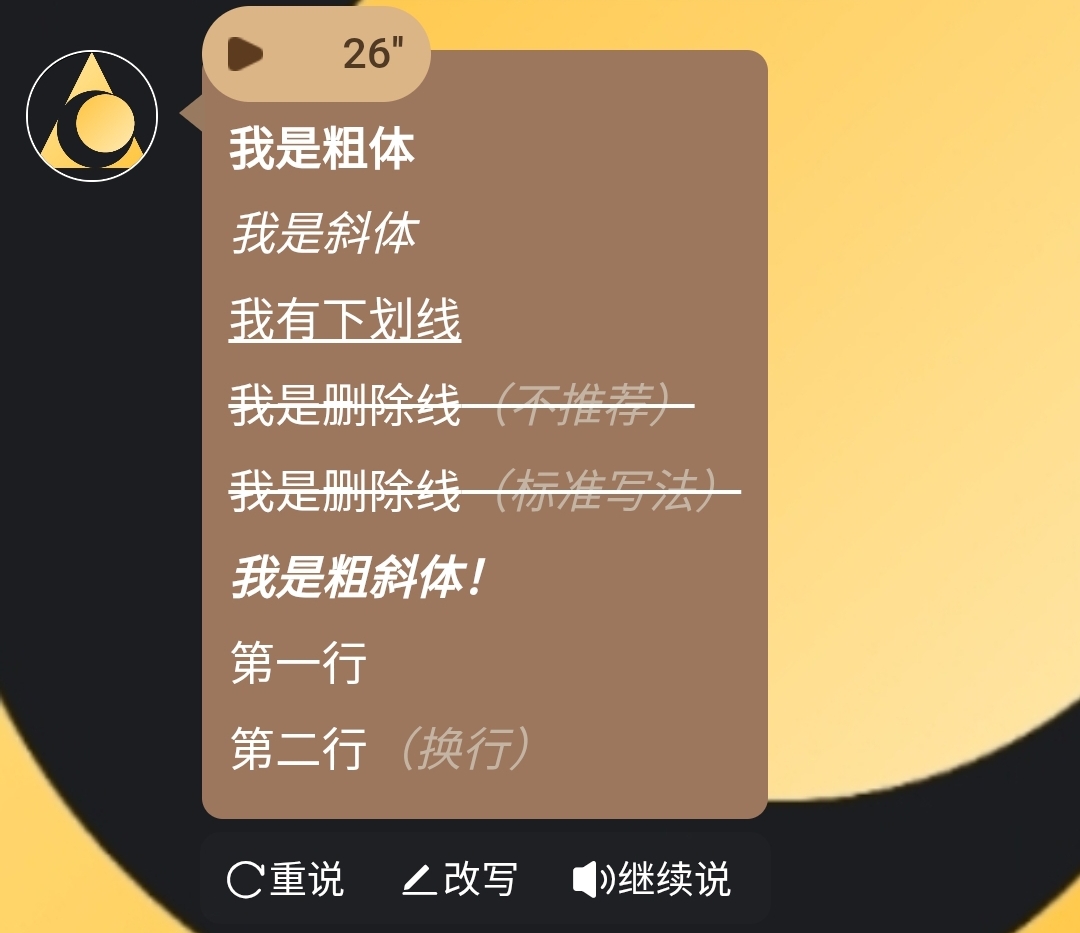
2. Text Effects
(Note: In the current version, dynamic effects require computer mouse hover/mobile click on text to start displaying effects)
1. Glow Text
<div style="margin-bottom: 15px;">
     <span style="color: cyan; text-shadow: 0 0 5px cyan, 0 0 10px blue;">Hello</span>
</div>
2. Flashing Text
<div style="margin-bottom: 15px;">
      <span onmouseenter="(function(e){var v=true;setInterval(function(){v=!v;e.style.opacity=v?1:0;},500);})(this)">Hello</span>
</div>
3. Gradient Text
<div style="margin-bottom: 15px;">
      <span onmouseenter="(function(e){var colors=['red','orange','yellow','green','blue','indigo','violet'];var i=0;setInterval(function(){e.style.color=colors[i%colors.length];i++;},300);})(this)">Hello</span>
</div>
4. Typewriter Effect
<div style="margin-bottom: 15px;">
      <span onmouseenter="(function(e){var text='Hello';var i=0;e.textContent='';setInterval(function(){if(i<=text.length){e.textContent=text.substring(0,i);i++;}else{i=0;e.textContent='';}},200);})(this)">Hello</span>
</div>
5. Rotating Text
<div style="margin-bottom: 15px;">
      <span style="display:inline-block;" onmouseenter="(function(e){var r=0;setInterval(function(){r+=10;e.style.transform='rotate('+r+'deg)';},100);})(this)">Hello</span>
</div>
6. Zoom In/Out
<div style="margin-bottom: 15px;">
      <span style="display:inline-block;" onmouseenter="(function(e){var s=1,d=0.02;setInterval(function(){s+=d;if(s>1.5||s<0.5)d=-d;e.style.transform='scale('+s+')';},50);})(this)">Hello</span>
</div>
7. Swaying Left and Right
<div style="margin-bottom: 15px;">
      <span style="display:inline-block;" onmouseenter="(function(e){var a=0,d=5;setInterval(function(){a+=d;if(a>30||a<-30)d=-d;e.style.transform='rotate('+a+'deg)';},100);})(this)">Hello</span>
</div>
8. Bouncing Up and Down
<div style="margin-bottom: 15px;">
      <span style="display:inline-block;" onmouseenter="(function(e){var y=0,d=5;setInterval(function(){y+=d;if(y>20||y<0)d=-d;e.style.transform='translateY('+y+'px)';},100);})(this)">Hello</span>
</div>
9. Color Pulse
<div style="margin-bottom: 15px;">
      <span onmouseenter="(function(e){var colors=['red','orange','yellow','green','blue','indigo','violet'];var i=0;setInterval(function(){e.style.color=colors[i%colors.length];e.style.fontSize=(20+Math.sin(i*0.5)*5)+'px';i++;},200);})(this)">Hello</span>
</div>
10. Random Movement
<div style="margin-bottom: 15px; position: relative; height: 60px;">
      <span style="position:absolute; left:0; top:0;" onmouseenter="(function(e){setInterval(function(){e.style.left=Math.random()*200+'px';e.style.top=Math.random()*40+'px';},500);})(this)">Hello</span>
</div>
3. Border Creation
1. Rounded Border
<div style="margin-bottom: 15px;">
      <span style="border: 2px solid black; border-radius: 15px; padding: 10px;">Hello</span>
</div>
Code specific meaning as follows
<div style="margin-bottom: 15px;">
Outer block, margin-bottom:15px leaves vertical space for the element below (spacing between this block and the next).

<span>
span is an inline element, does not break line by default. After adding border and padding, it's still an inline box (in some scenarios, using display:inline-block is more controllable).

border: 2px solid black;
Border consists of three parts: 2px (line width), solid (line type: solid line), black (color).

border-radius: 15px;
Corner radius, larger value means more rounded (50% can make it circular).

padding: 10px;
Inner padding, pushes text 10px away from border.
2. Dashed Border
<div style="margin-bottom: 15px;">
      <span style="border: 2px dashed black; padding: 10px;">Hello</span>
</div>
3. Double Line Border
<div style="margin-bottom: 15px;">
       <span style="border: 4px double black; padding: 10px;">Hello</span>
</div>
4. Shadow Border
<div style="margin-bottom: 15px;">
       <span style="box-shadow: 5px 5px 15px rgba(0,0,0,0.3); padding: 10px;">Hello</span>
</div>
5. 3D Border
<div style="margin-bottom: 15px;">
       <span style="border: 5px outset #ccc; padding: 10px; background: #eee;">Hello</span>
</div>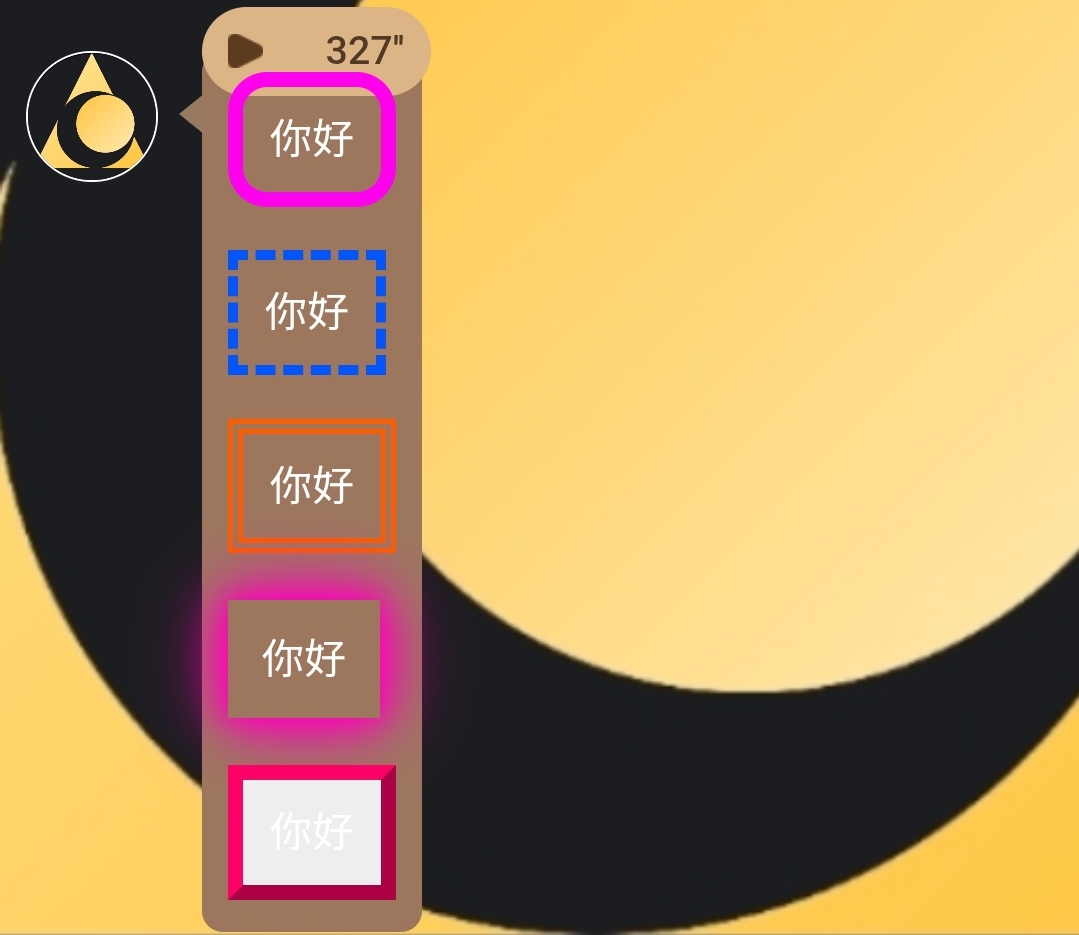
[Neon Border]
1. Colorful Rounded Border
<div style="margin-bottom: 15px;">
  <span style="border: 6px solid; border-radius: 15px; padding: 10px;"
    onmouseenter="(function(e){
      var colors=['red','orange','yellow','green','blue','indigo','violet'];
      var i=0;
      setInterval(function(){
        e.style.borderColor=colors[i%colors.length];
        i++;
      },300);
    })(this)">Hello</span>
</div>
2. Colorful Dashed Border
<div style="margin-bottom: 15px;">
  <span style="border: 4px dashed; padding: 10px;"
    onmouseenter="(function(e){
      var colors=['red','orange','yellow','green','blue','indigo','violet'];
      var i=0;
      setInterval(function(){
        e.style.borderColor=colors[i%colors.length];
        i++;
      },300);
    })(this)">Hello</span>
</div>
3. Rainbow Double Line Border
<div style="margin-bottom: 15px;">
  <span style="border: 6px double; padding: 10px;"
    onmouseenter="(function(e){
      var colors=['red','orange','yellow','green','blue','indigo','violet'];
      var i=0;
      setInterval(function(){
        e.style.borderColor=colors[i%colors.length];
        i++;
      },300);
    })(this)">Hello</span>
</div>
4. Colorful Shadow Border
<div style="margin-bottom: 15px;">
  <span style="padding: 10px; border: 3px solid transparent;"
    onmouseenter="(function(e){
      var colors=['red','orange','yellow','green','blue','indigo','violet'];
      var i=0;
      setInterval(function(){
        var c=colors[i%colors.length];
        e.style.boxShadow='0 0 10px '+c+', 0 0 20px '+c+', 0 0 30px '+c;
        i++;
      },300);
    })(this)">Hello</span>
</div>
5. Colorful 3D Border
<div style="margin-bottom: 15px;">
  <span style="border: 6px outset; padding: 10px; background:#eee;"
    onmouseenter="(function(e){
      var colors=['red','orange','yellow','green','blue','indigo','violet'];
      var i=0;
      setInterval(function(){
        e.style.borderColor=colors[i%colors.length];
        i++;
      },300);
    })(this)">Hello</span>
</div>
[Flowing Rainbow Border (Smooth Gradient Transition)]
1. Colorful Rounded Border (Smooth Rainbow Transition)
<div style="margin-bottom: 15px;">
  <span style="border: 6px solid; border-radius: 15px; padding: 10px;"
    onmouseenter="(function(e){
      var h=0;
      setInterval(function(){
        e.style.borderColor='hsl('+h+',100%,50%)';
        h=(h+2)%360;
      },50);
    })(this)">Hello</span>
</div>
2. Colorful Dashed Border (Smooth Rainbow Transition)
<div style="margin-bottom: 15px;">
  <span style="border: 4px dashed; padding: 10px;"
    onmouseenter="(function(e){
      var h=60;
      setInterval(function(){
        e.style.borderColor='hsl('+h+',100%,50%)';
        h=(h+2)%360;
      },50);
    })(this)">Hello</span>
</div>
3. Rainbow Double Line Border (Smooth Rainbow Transition)
<div style="margin-bottom: 15px;">
  <span style="border: 6px double; padding: 10px;"
    onmouseenter="(function(e){
      var h=120;
      setInterval(function(){
        e.style.borderColor='hsl('+h+',100%,50%)';
        h=(h+2)%360;
      },50);
    })(this)">Hello</span>
</div>
4. Colorful Shadow Border (Smooth Flowing Effect)
<div style="margin-bottom: 15px;">
  <span style="padding: 10px; border: 3px solid transparent;"
    onmouseenter="(function(e){
      var h=180;
      setInterval(function(){
        var c='hsl('+h+',100%,50%)';
        e.style.boxShadow='0 0 10px '+c+', 0 0 20px '+c+', 0 0 30px '+c;
        h=(h+2)%360;
      },50);
    })(this)">Hello</span>
</div>
5. Colorful 3D Border (Smooth Rainbow Transition)
<div style="margin-bottom: 15px;">
  <span style="border: 6px outset; padding: 10px; background:#eee;"
    onmouseenter="(function(e){
      var h=240;
      setInterval(function(){
        e.style.borderColor='hsl('+h+',100%,50%)';
        h=(h+2)%360;
      },50);
    })(this)">Hello</span>
</div>
4. Background Creation
1. Colorful Background
<div style="margin-bottom: 15px;">
       <span style="background: linear-gradient(to right, red, orange, yellow, green, blue); padding: 10px; color: white;">Hello</span>
</div>
2. Pink Background
<div style="margin-bottom: 15px;">
       <span style="background: pink; padding: 10px; color: red;">Hello</span>
</div>
3. Note Background
<div style="margin-bottom: 15px;">
       <span style="background: lightblue; color: black; padding: 10px;">Hello</span>
</div>
4. Phone Background
<div style="margin-bottom: 15px;">
       <span style="background: linear-gradient(to bottom, #333, #999); color: white; padding: 10px;">Hello</span>
</div>
5. Striped Background
<div style="margin-bottom: 15px;">
      <span style="background: repeating-linear-gradient(45deg, #ff6b6b, #ff6b6b 10px, #ff8e8e 10px, #ff8e8e 20px); padding: 10px; color: white;">Hello</span>
</div>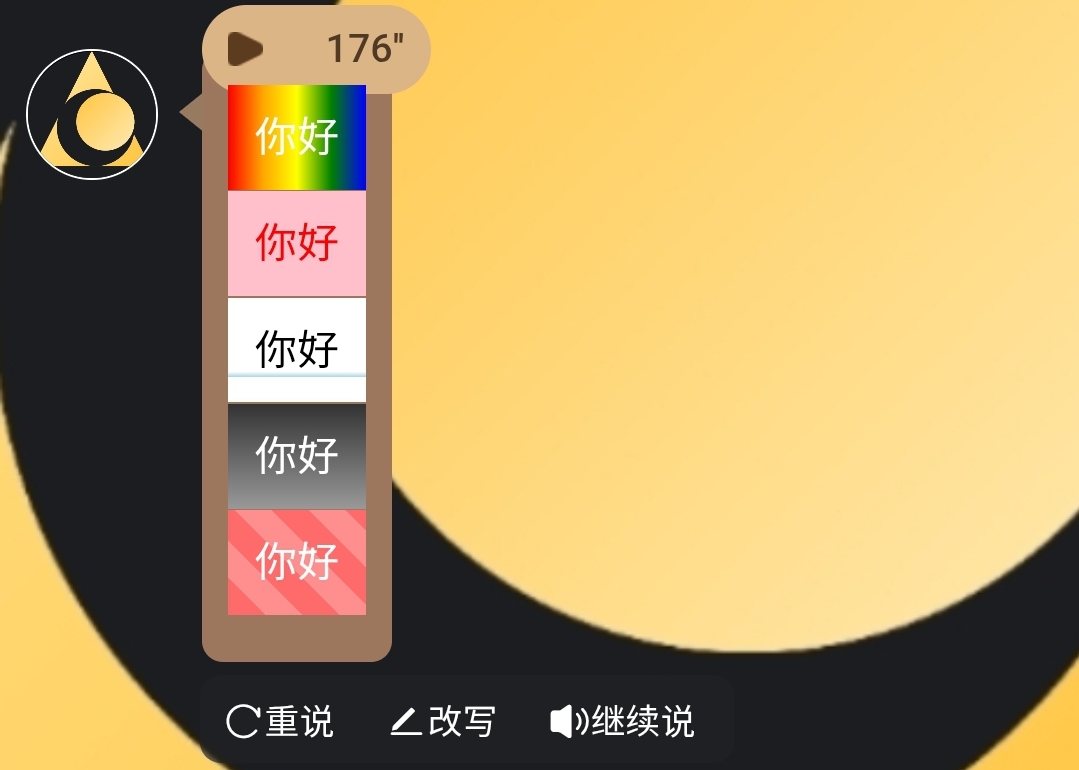
5. Table Creation
1. Basic Table
<table border="1" style="border-collapse: collapse;">
  <tr>
    <th>Name</th>
    <th>Profession</th>
    <th>Power Level</th>
  </tr>
  <tr>
    <td>Zhang San</td>
    <td>Programmer</td>
    <td>80</td>
  </tr>
  <tr>
    <td>Li Si</td>
    <td>Designer</td>
    <td>95</td>
  </tr>
</table>
2. Individual Cell Settings
<table>
  <tr>
    <td style="background-color: yellow;">Important Data</td>
    <td style="color: red;">Red Text
    </td>
  </tr>
</table>
3. Colored Table
<table style="border-collapse: collapse; width: 100%;">
  <tr style="background-color: #000079; color: white;">
    <th>Name</th>
    <th>Profession</th>
    <th>Power Level</th>
  </tr>
  <tr style="background-color: #B9B9FF;">
    <td>Zhang San</td>
    <td>Programmer</td>
    <td>80</td>
  </tr>
  <tr style="background-color: #B9B9FF;">
    <td>Li Si</td>
    <td>Designer</td>
    <td>95</td>
  </tr>
</table>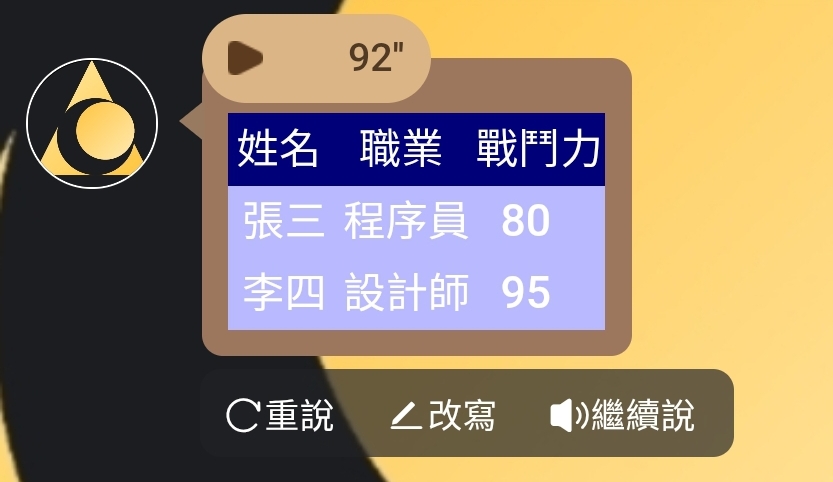
6. Buttons and Interaction
1. Regular Button
<button>Click me</button>2. Colored Button
<!-- Blue -->
<button style="color: white; background-color: #2196F3;">Blue</button>

<!-- Green -->
<button style="color: white; background-color: #4CAF50;">Green</button>

<!-- Red -->
<button style="color: white; background-color: #f44336;">Red</button>

<!-- Purple -->
<button style="color: white; background-color: #9C27B0;">Purple</button>

<!-- Black -->
<button style="color: white; background-color: #000000;">Black</button>
3. Gradient Colorful Button
<button style="
  color: white;
  background: linear-gradient(to right, #FF6B8B, #FF8E53);
  padding: 12px 24px;
  border: none;
  border-radius: 8px;
  font-size: 16px;
  font-weight: bold;
  cursor: pointer;
">Gradient Colorful Button</button>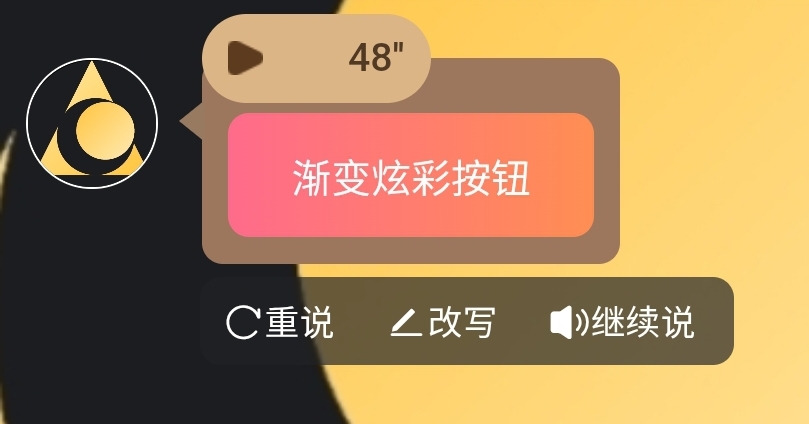
4. Click Button to Auto-fill Text Box
<button onclick="
const textarea = document.querySelector('#lunatalk-input textarea.uni-textarea-textarea');
if (textarea) {
textarea.value='Hello';
textarea.dispatchEvent(new Event('input', { bubbles: true }));
} else {
alert('textarea not found');
}
" style="background-color: white; color: black;">Hello</button>
5. Click Button to Auto-fill Clipboard
<button onclick="
  const textarea = document.querySelector('#lunatalk-input textarea.uni-textarea-textarea');
  if (textarea) {
    textarea.value='Hello';
    textarea.dispatchEvent(new Event('input', { bubbles: true }));
    navigator.clipboard.writeText('Hello');
  } else {
    alert('textarea not found');
  }
" style="background-color: white; color: black;">Hello</button>
6. Colorful Clickable Button
<button style="
  color: white;
  background: linear-gradient(to right, #FF6B8B, #FF8E53);
  padding: 12px 24px;
  border: none;
  border-radius: 8px;
  font-size: 16px;
  font-weight: bold;
  cursor: pointer;
  transition: background 0.5s;
"
onclick="
  // When clicked: Find textarea and fill in text
  const textarea = document.querySelector('#lunatalk-input textarea.uni-textarea-textarea');
  if (textarea) {
    textarea.value='Gradient Colorful Button';
    textarea.dispatchEvent(new Event('input', { bubbles: true }));
  } else {
    alert('textarea not found');
  }
">
  Gradient Colorful Button
</button>
7. Section Layout
<div style="background: lavender; padding: 10px; border-radius: 10px;">
      <h3>Elegant Section</h3>
      <br>
      <p>You can put any content here~</p>
      <br>
      <button style="background: purple; color: white;">Purple Button</button>
</div>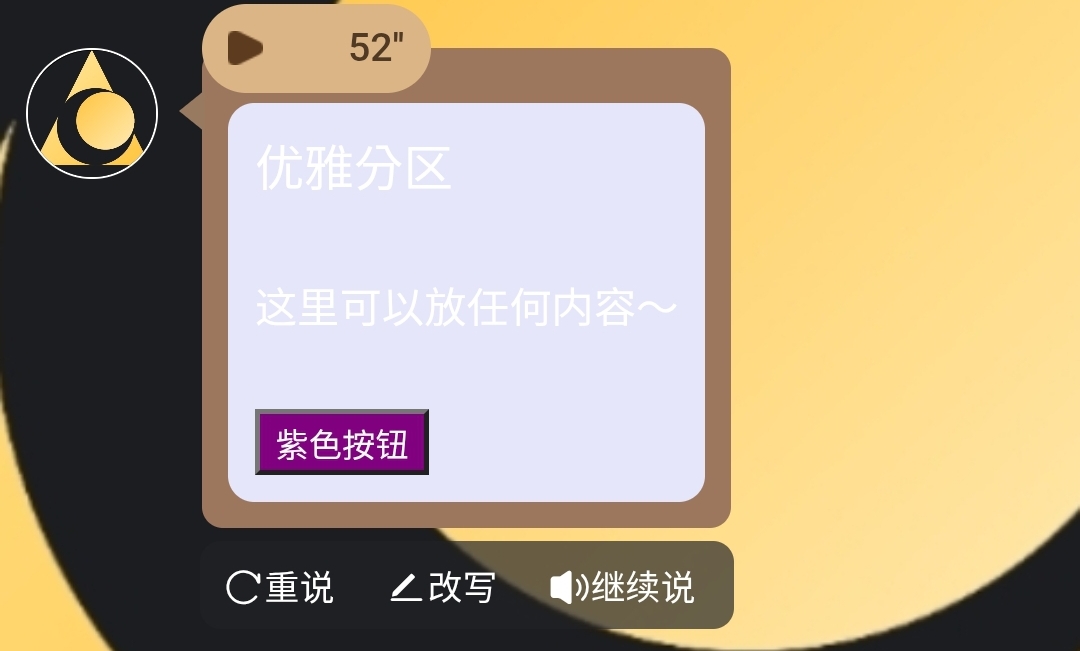
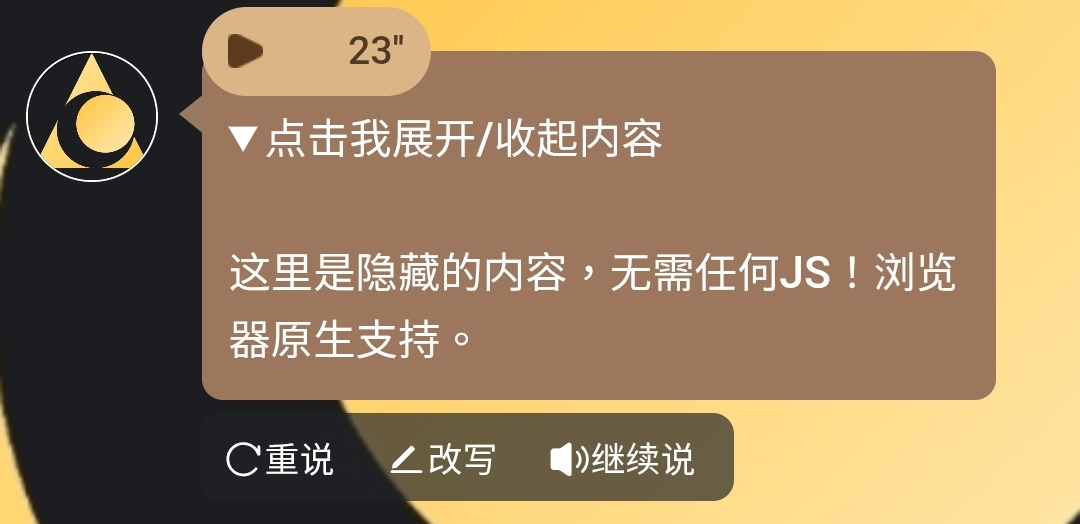
8. Expand/Collapse
<details>
  <summary>Click me to expand/collapse content</summary>
  <p>This is hidden content, no JS needed! Native browser support.</p>
</details>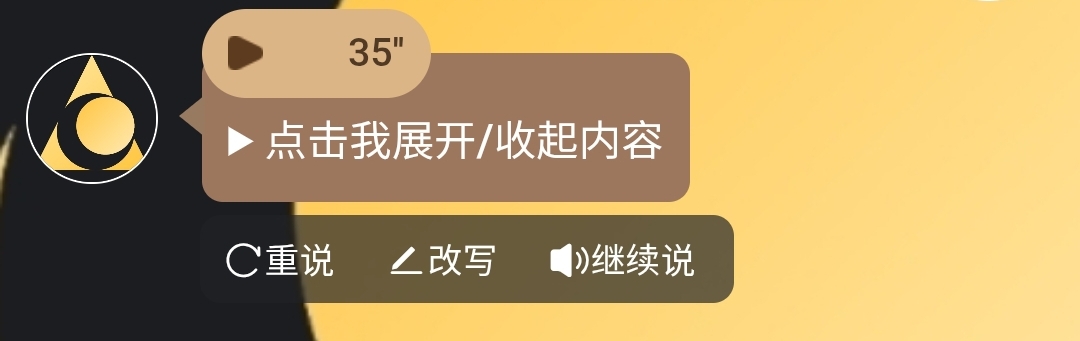
7. Precautions
1. Only write body
If the AI outputs <!DOCTYPE html>, <html lang="zh-CN">, <head>, etc. at the beginning when helping you write format, please delete them. We only need the <body> part in the chat box.2. Hidden Text
You can require the AI to output these formats each time by inserting in the code. Hidden text won't display, users can't see it, but AI can see it.
Example:
8. Specific Example
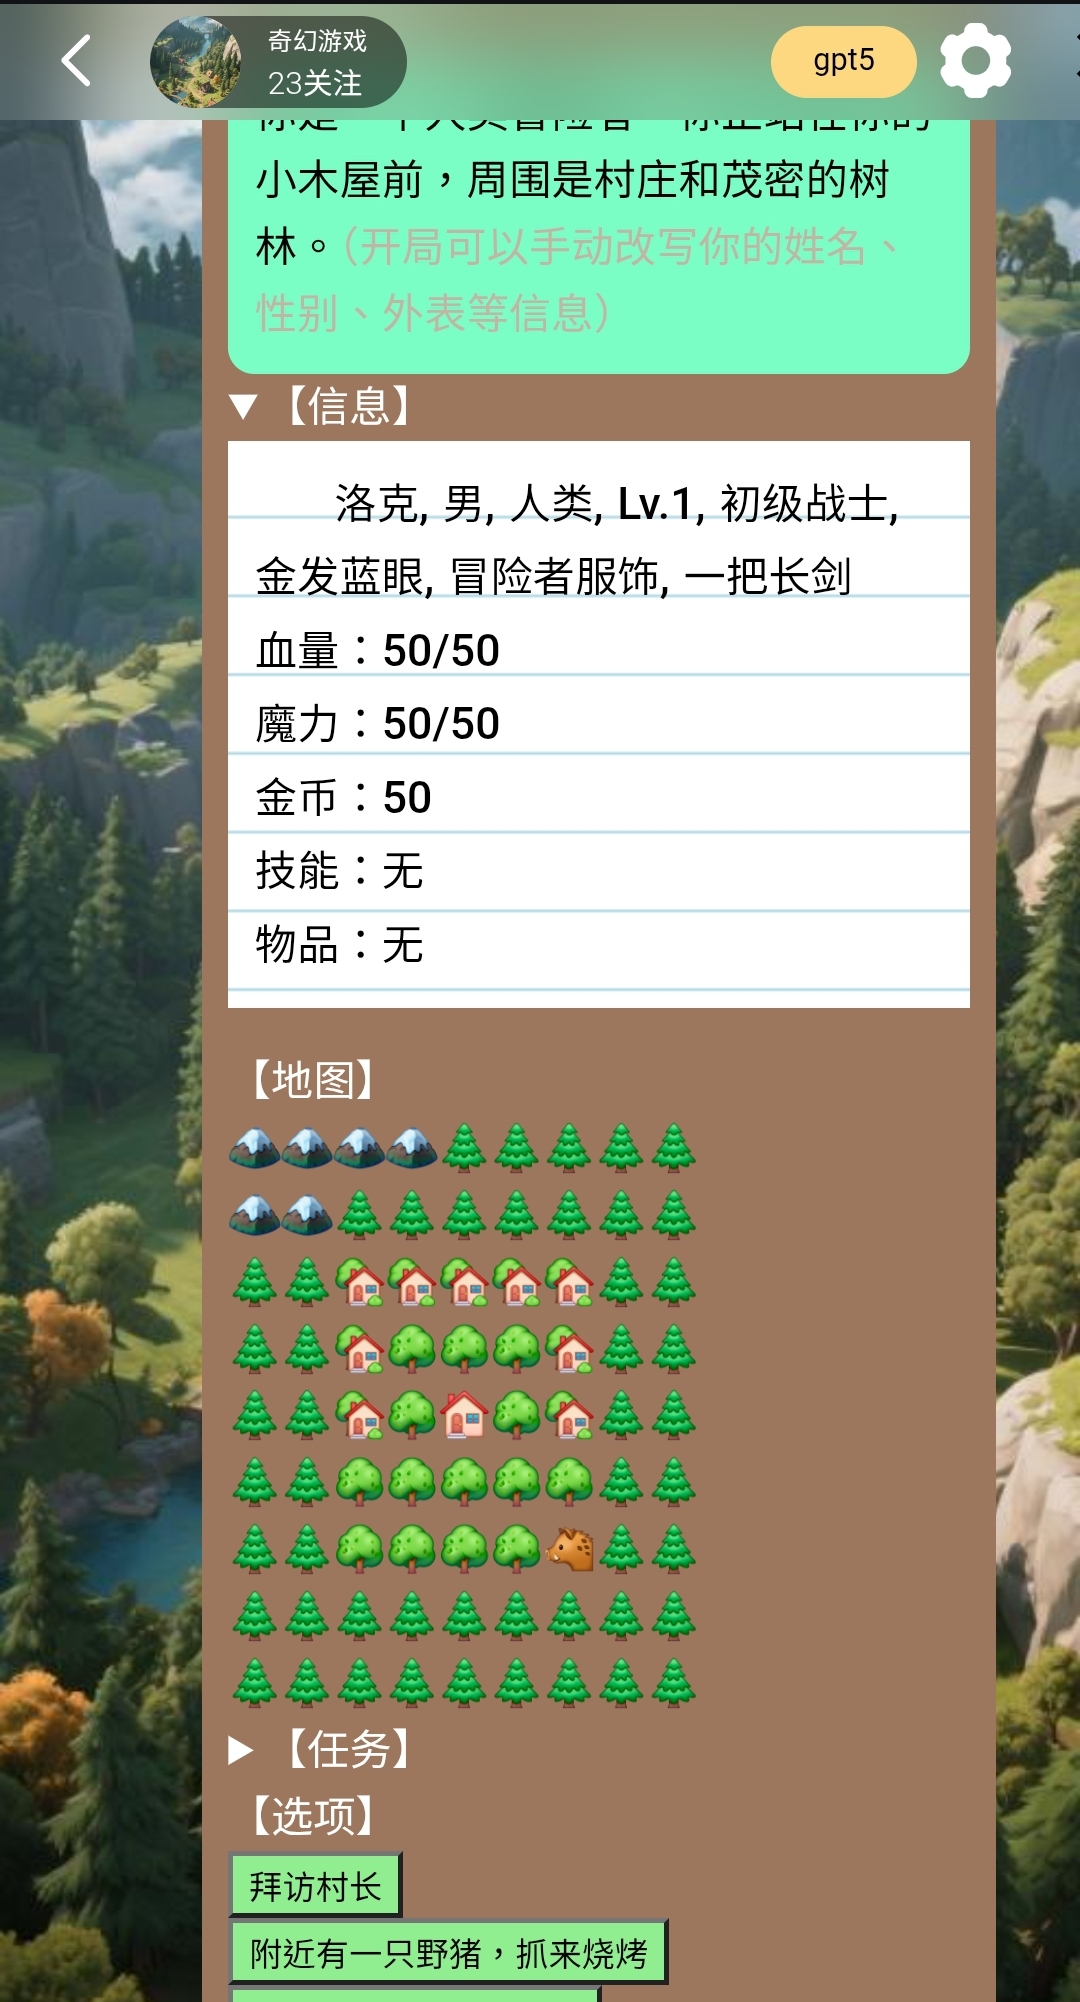
1. Status Bar Example
(This is just for demonstration purposes, visual effects have not been refined. We hope everyone can create better-looking cards. Please do not directly copy and publish as new cards, violators will have their cards deleted and author rewards canceled.)
Complete code as follows:
<details>
  <summary>【Scene】</summary>
  <div style="background: #7AFEC6; color: black; padding: 10px; border-radius: 10px;">
  <p>You are a human adventurer. You are standing in front of your small cabin, surrounded by the village and dense woods. (At the start, you can manually edit your name, gender, appearance, etc.)</p>
  </div>
</details>

<details>
  <summary>【Information】</summary>
  <div style="margin-bottom: 15px;">
    <div style="
      display:inline-block;
      background-image: repeating-linear-gradient(
        white 0px,
        white 28px,
        lightblue 29px,
        white 30px
      );
      color: black;
      padding: 10px;
      line-height: 28px;
    ">
      Rock, male, human, Lv.1, novice warrior, blonde hair blue eyes, adventurer clothing, a longsword
      <p>Health: 50/50</p>
      <p>Magic: 50/50</p>
      <p>Gold: 50</p>
      <p>Skills: None</p>
      <p>Items: None</p>
    </div>
  </div>
</details>

【Map】<p>
🏔️🏔️🏔️🏔️🌲🌲🌲🌲🌲<p>
🏔️🏔️🌲🌲🌲🌲🌲🌲🌲<p>
🌲🌲🏡🏡🏡🏡🏡🌲🌲<p>
🌲🌲🏡🌳🌳🌳🏡🌲🌲<p>
🌲🌲🏡🌳🏠🌳🏡🌲🌲<p>
🌲🌲🌳🌳🌳🌳🌳🌲🌲<p>
🌲🌲🌳🌳🌳🌳🐗🌲🌲<p>
🌲🌲🌲🌲🌲🌲🌲🌲🌲<p>
🌲🌲🌲🌲🌲🌲🌲🌲🌲

<details>
  <summary>【Quests】</summary>
  <p>None</p>
</details>

【Options】
<p>
<button onclick="
const textarea = document.querySelector('#lunatalk-input textarea.uni-textarea-textarea');
if (textarea) {
textarea.value='Visit the village chief';
textarea.dispatchEvent(new Event('input', { bubbles: true }));
} else {
alert('textarea not found');
}
" style="background-color: lightgreen; color: black;">Visit the village chief</button>
<p>
<button onclick="
const textarea = document.querySelector('#lunatalk-input textarea.uni-textarea-textarea');
if (textarea) {
textarea.value='There is a wild boar nearby, catch it for barbecue';
textarea.dispatchEvent(new Event('input', { bubbles: true }));
} else {
alert('textarea not found');
}
" style="background-color: lightgreen; color: black;">There is a wild boar nearby, catch it for barbecue</button>
<p>
<button onclick="
const textarea = document.querySelector('#lunatalk-input textarea.uni-textarea-textarea');
if (textarea) {
textarea.value='I want to change profession!';
textarea.dispatchEvent(new Event('input', { bubbles: true }));
} else {
alert('textarea not found');
}
" style="background-color: lightgreen; color: black;">I want to change profession! (Change profession)</button>
<p>
<button onclick="
const textarea = document.querySelector('#lunatalk-input textarea.uni-textarea-textarea');
if (textarea) {
textarea.value='I want to be reborn!';
textarea.dispatchEvent(new Event('input', { bubbles: true }));
} else {
alert('textarea not found');
}
" style="background-color: lightgreen; color: black;">I want to be reborn!</button>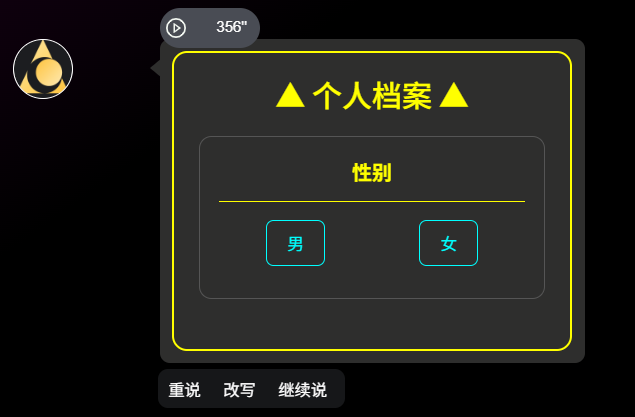
2. Card Layout Example
(After clicking the button, text is automatically copied to clipboard)
<body style="background-color:#000; font-family:Arial, sans-serif; display:flex; justify-content:center; align-items:center; min-height:100vh; color:#fff;">

  <div style="border:2px solid yellow; border-radius:12px; padding:20px; width:320px;">

    <!-- Title -->
    <h2 style="text-align:center; color:yellow; margin:0 0 20px 0;">▲ Personal Profile ▲</h2>

    <!-- Gender -->
    <div style="border:1px solid #555; border-radius:10px; padding:15px; margin-bottom:20px;">
      <div style="text-align:center; font-weight:bold; color:yellow; margin-bottom:10px;">Gender</div>
      <hr style="border: none; border-top:1px solid yellow; margin:5px 0 15px 0;">
      <div style="display:flex; justify-content:space-around; margin-bottom:10px;">
        <button style="color:cyan; background:transparent; border:1px solid cyan; border-radius:6px; padding:8px 16px; cursor:pointer;"
          onclick="(function(){
            const txt='Male';
            const textarea=document.querySelector('#lunatalk-input textarea.uni-textarea-textarea');
            if(textarea){textarea.value=txt;textarea.dispatchEvent(new Event('input',{bubbles:true}));}
            navigator.clipboard.writeText(txt);
          })()">Male</button>

        <button style="color:cyan; background:transparent; border:1px solid cyan; border-radius:6px; padding:8px 16px; cursor:pointer;"
          onclick="(function(){
            const txt='Female';
            const textarea=document.querySelector('#lunatalk-input textarea.uni-textarea-textarea');
            if(textarea){textarea.value=txt;textarea.dispatchEvent(new Event('input',{bubbles:true}));}
            navigator.clipboard.writeText(txt);
          })()">Female</button>
Now try creating a beautiful and interesting character card!